
The skills needed to work in settings like these have been developed over decades with our remote access projects. While they can be applied in a wide variety of settings it is critical to have a general grasp of what you’re doing. To know your limits and when to ask for help. A support team if it’s available of qualified individuals, access to first aid etc.
Retaining walls using steel, wood and stone on trails assist in access of challenging terrain. Where a full bench trail is not possible and/or where the risk of erosion is high. The ideal material depends on several factors. Including material/build cost, environmental considerations, best material for the specific site and long term durability for the local climate. The excavation of the ground can be difficult. Being adaptable to the terrain is important. Various tools are at your disposal.
The construction using different materials is relatively similar. Tie backs/deadmans, batter, solid soil. And a good understanding of what the limits are of the final chosen materials. If you are new to installing retaining walls, there is a lot of data available online these days. As well as through the USFS as they created many of the standards that underpin the industry.
I tend to be less scientific with my descriptions. If you’re looking for more technical language and images please seek out additional resources.
………………………………
This design below was a 2.5-3’ tall PT wall. For this particular project we used an Ammoniacal Copper Zinc Arsenate ACZA pressure treated wood. To fill in the gaps on the wall between the stringers before backfilling with rock/gravel/earth I would recommend 2×8 on the inside screwed to the 6×6 gap left by the stacked stringers. For extra strength and a clean visible face you can also use custom cut 6×6 pieces that are attached to the rest of the wall with vertical rebar. Seen below.
This project had a 12’ clear span and we wanted to use full length pieces, and then an 5’ angled 6×6 on the upstream side to hold in the trail at the corner. One level of deadmans with the 6×6 pieces filling in the gaps created there.
The first idea we explored was to build a bridge that would put the trail over air and skip the tight fit against the cliff. The other idea was to build the trail lower where it looked like there was more dirt and then a stair case to the water side around two 20” cedar trees with associated roots.
Both of those options it was determined would be less secure and/or more expensive.
Excavate ground as much as possible for the base stringers. The wall itself ideally will have a batter or slight angle to it as you build. If you’re doing a design yourself and build I usually do about 10 degrees walls but this isnt always possible if the terrain is unforgiving. While we have built vertical walls you never want to have the wall tipping outwards.
Ideally you have at minimum several inches on the outside of the first stringer of solid ground. But this is not always possible. In the spaces where you are building retaining walls with minimal to no outside ground support from the beginning of the installation process you will want to be considering several things.
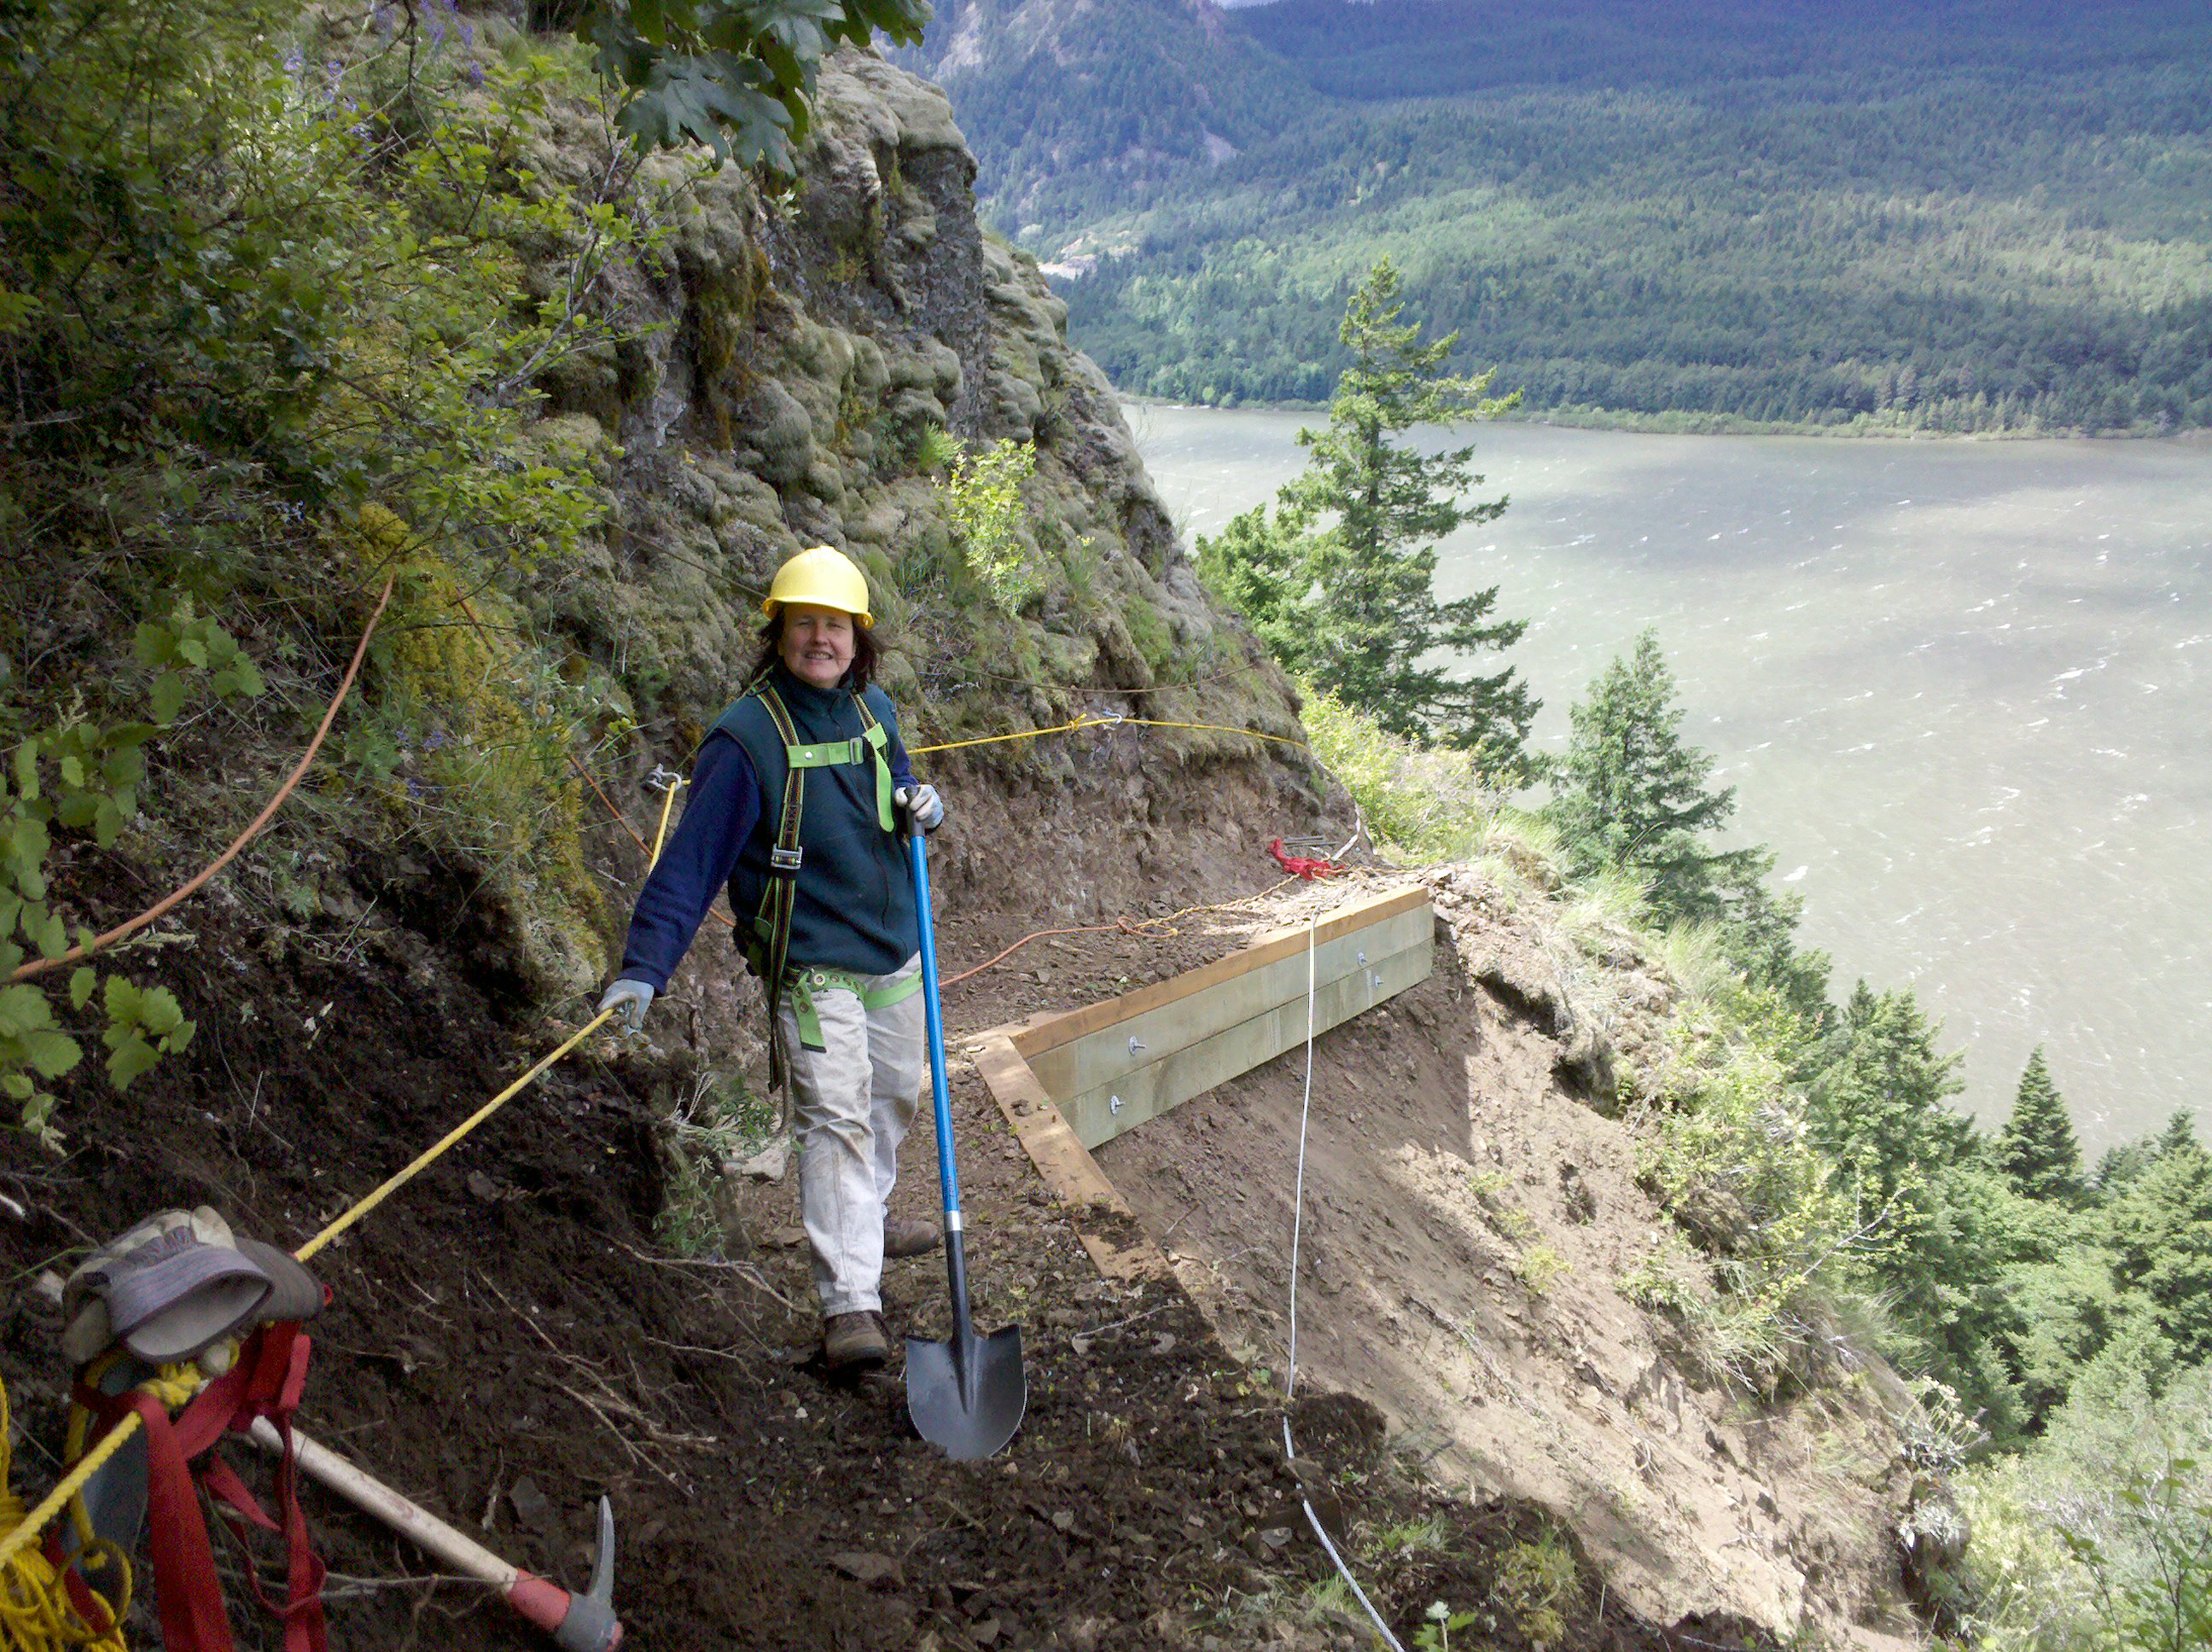
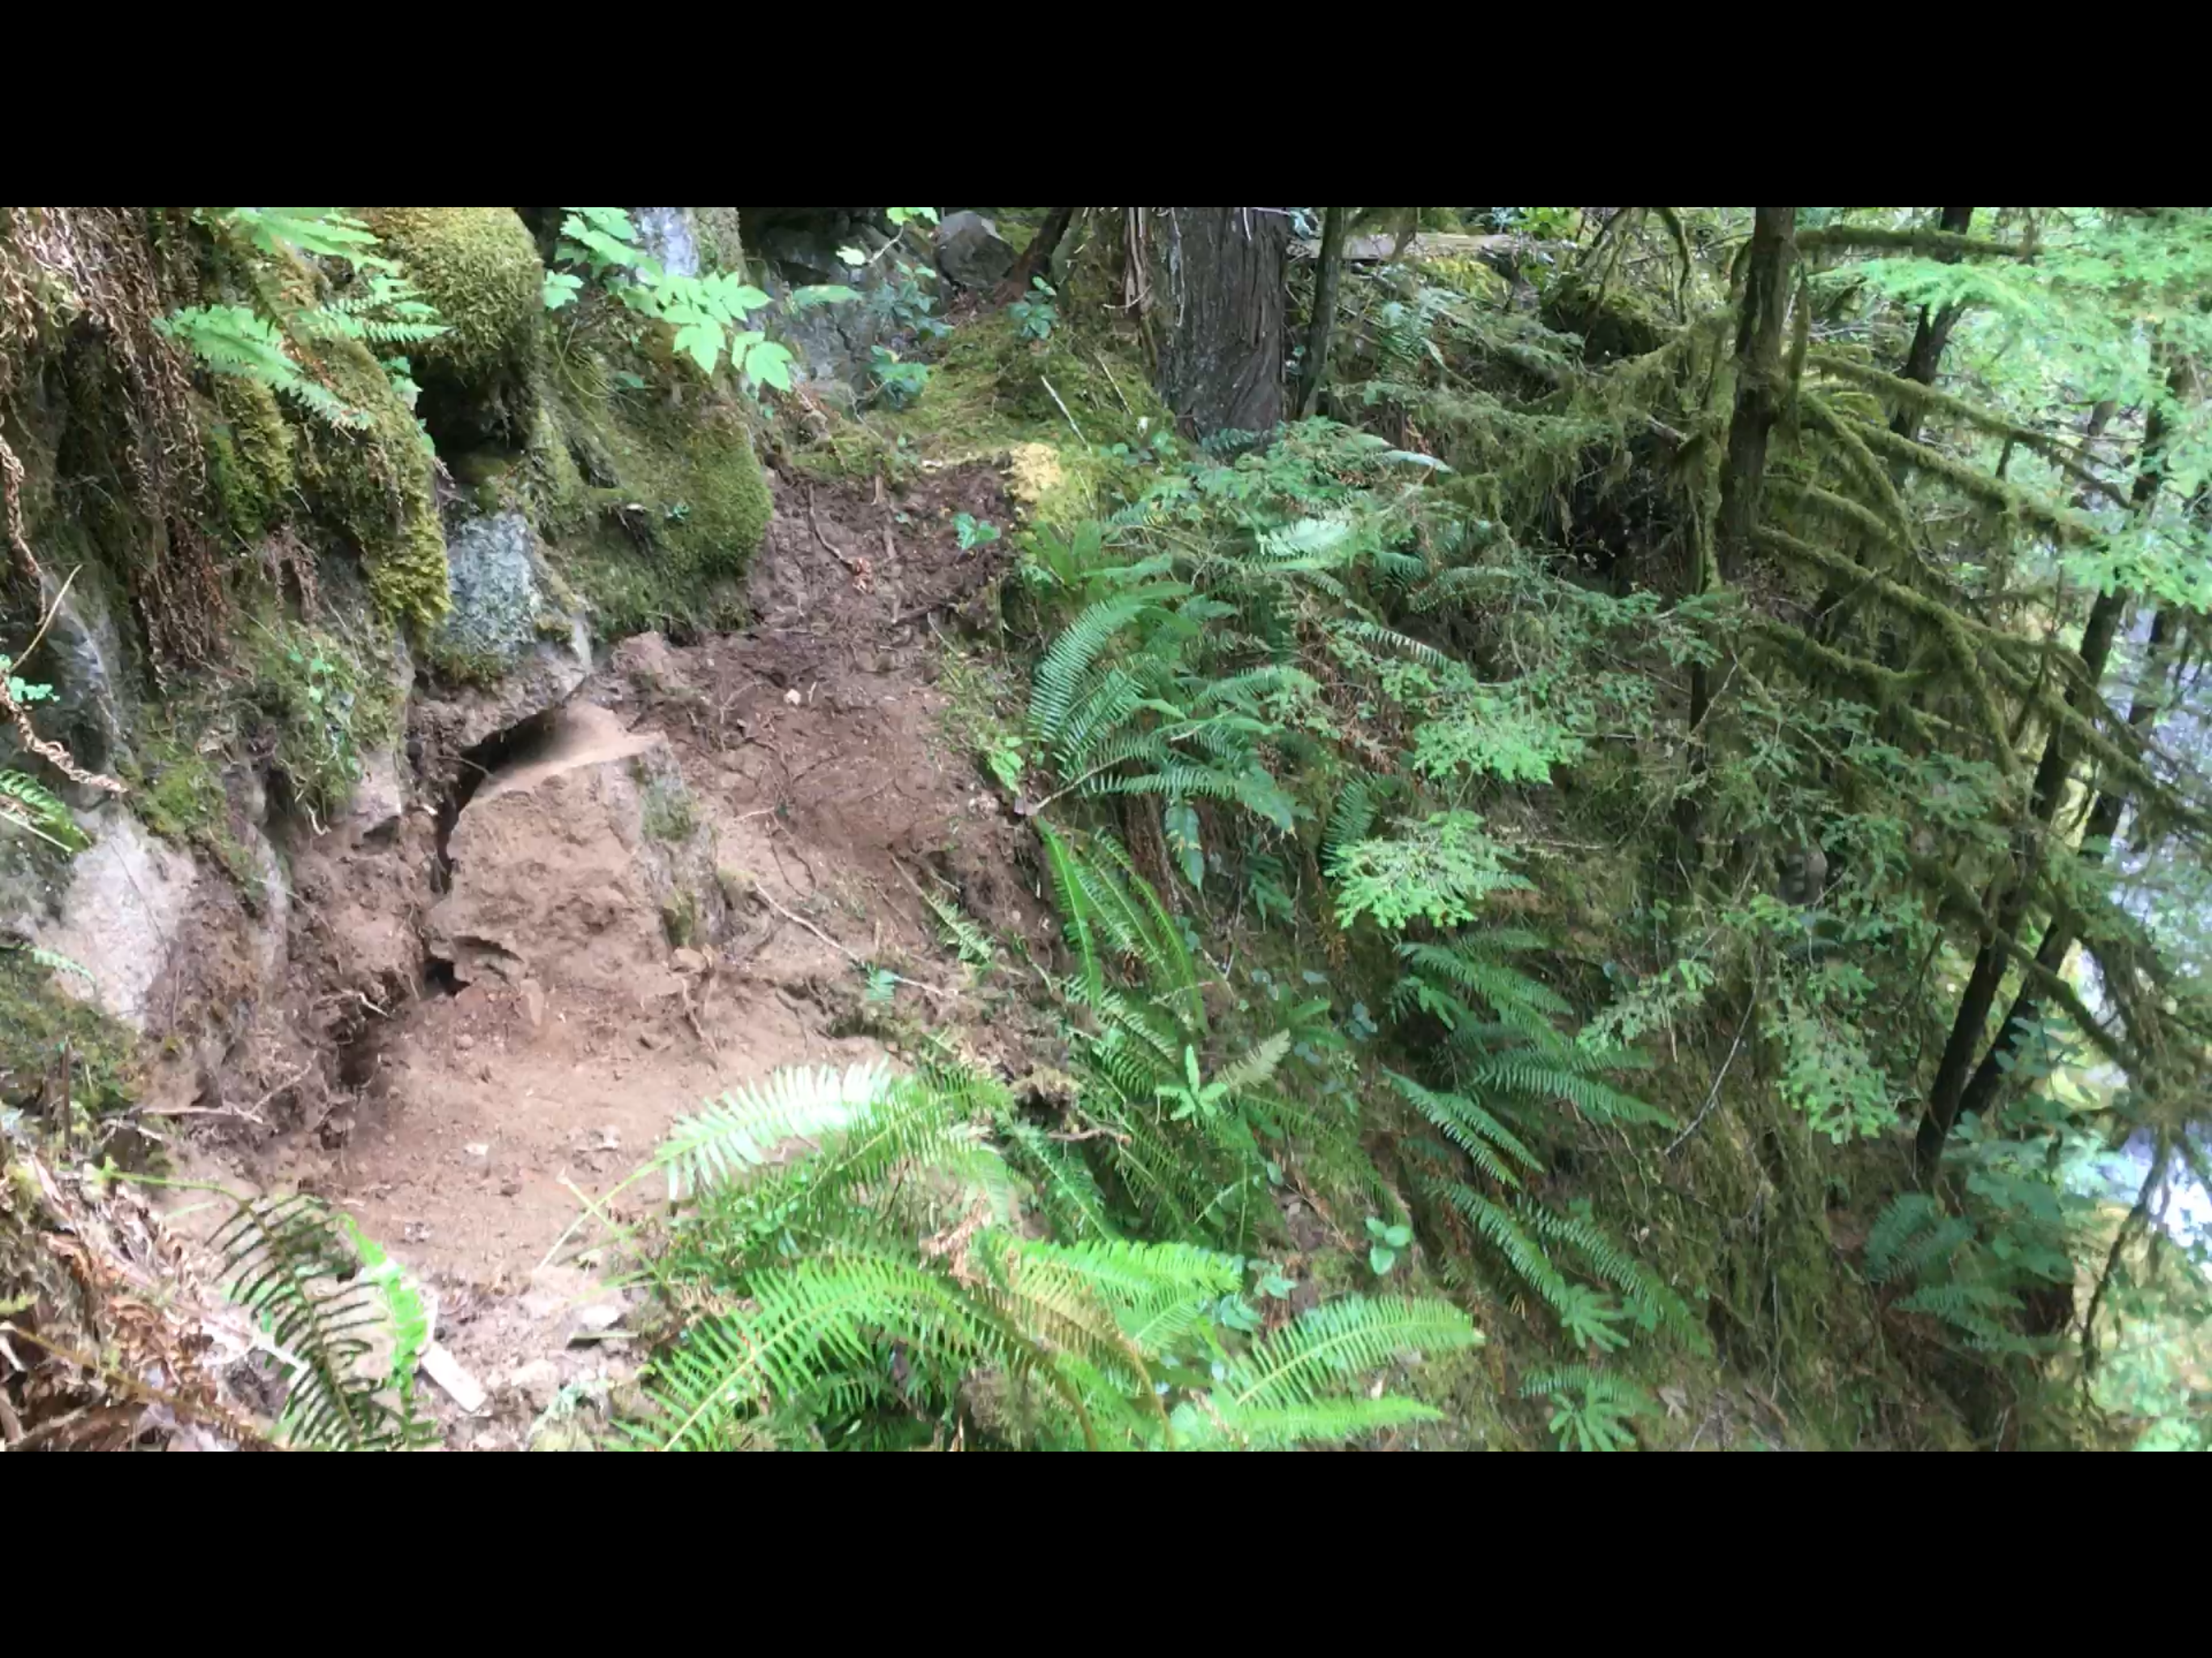
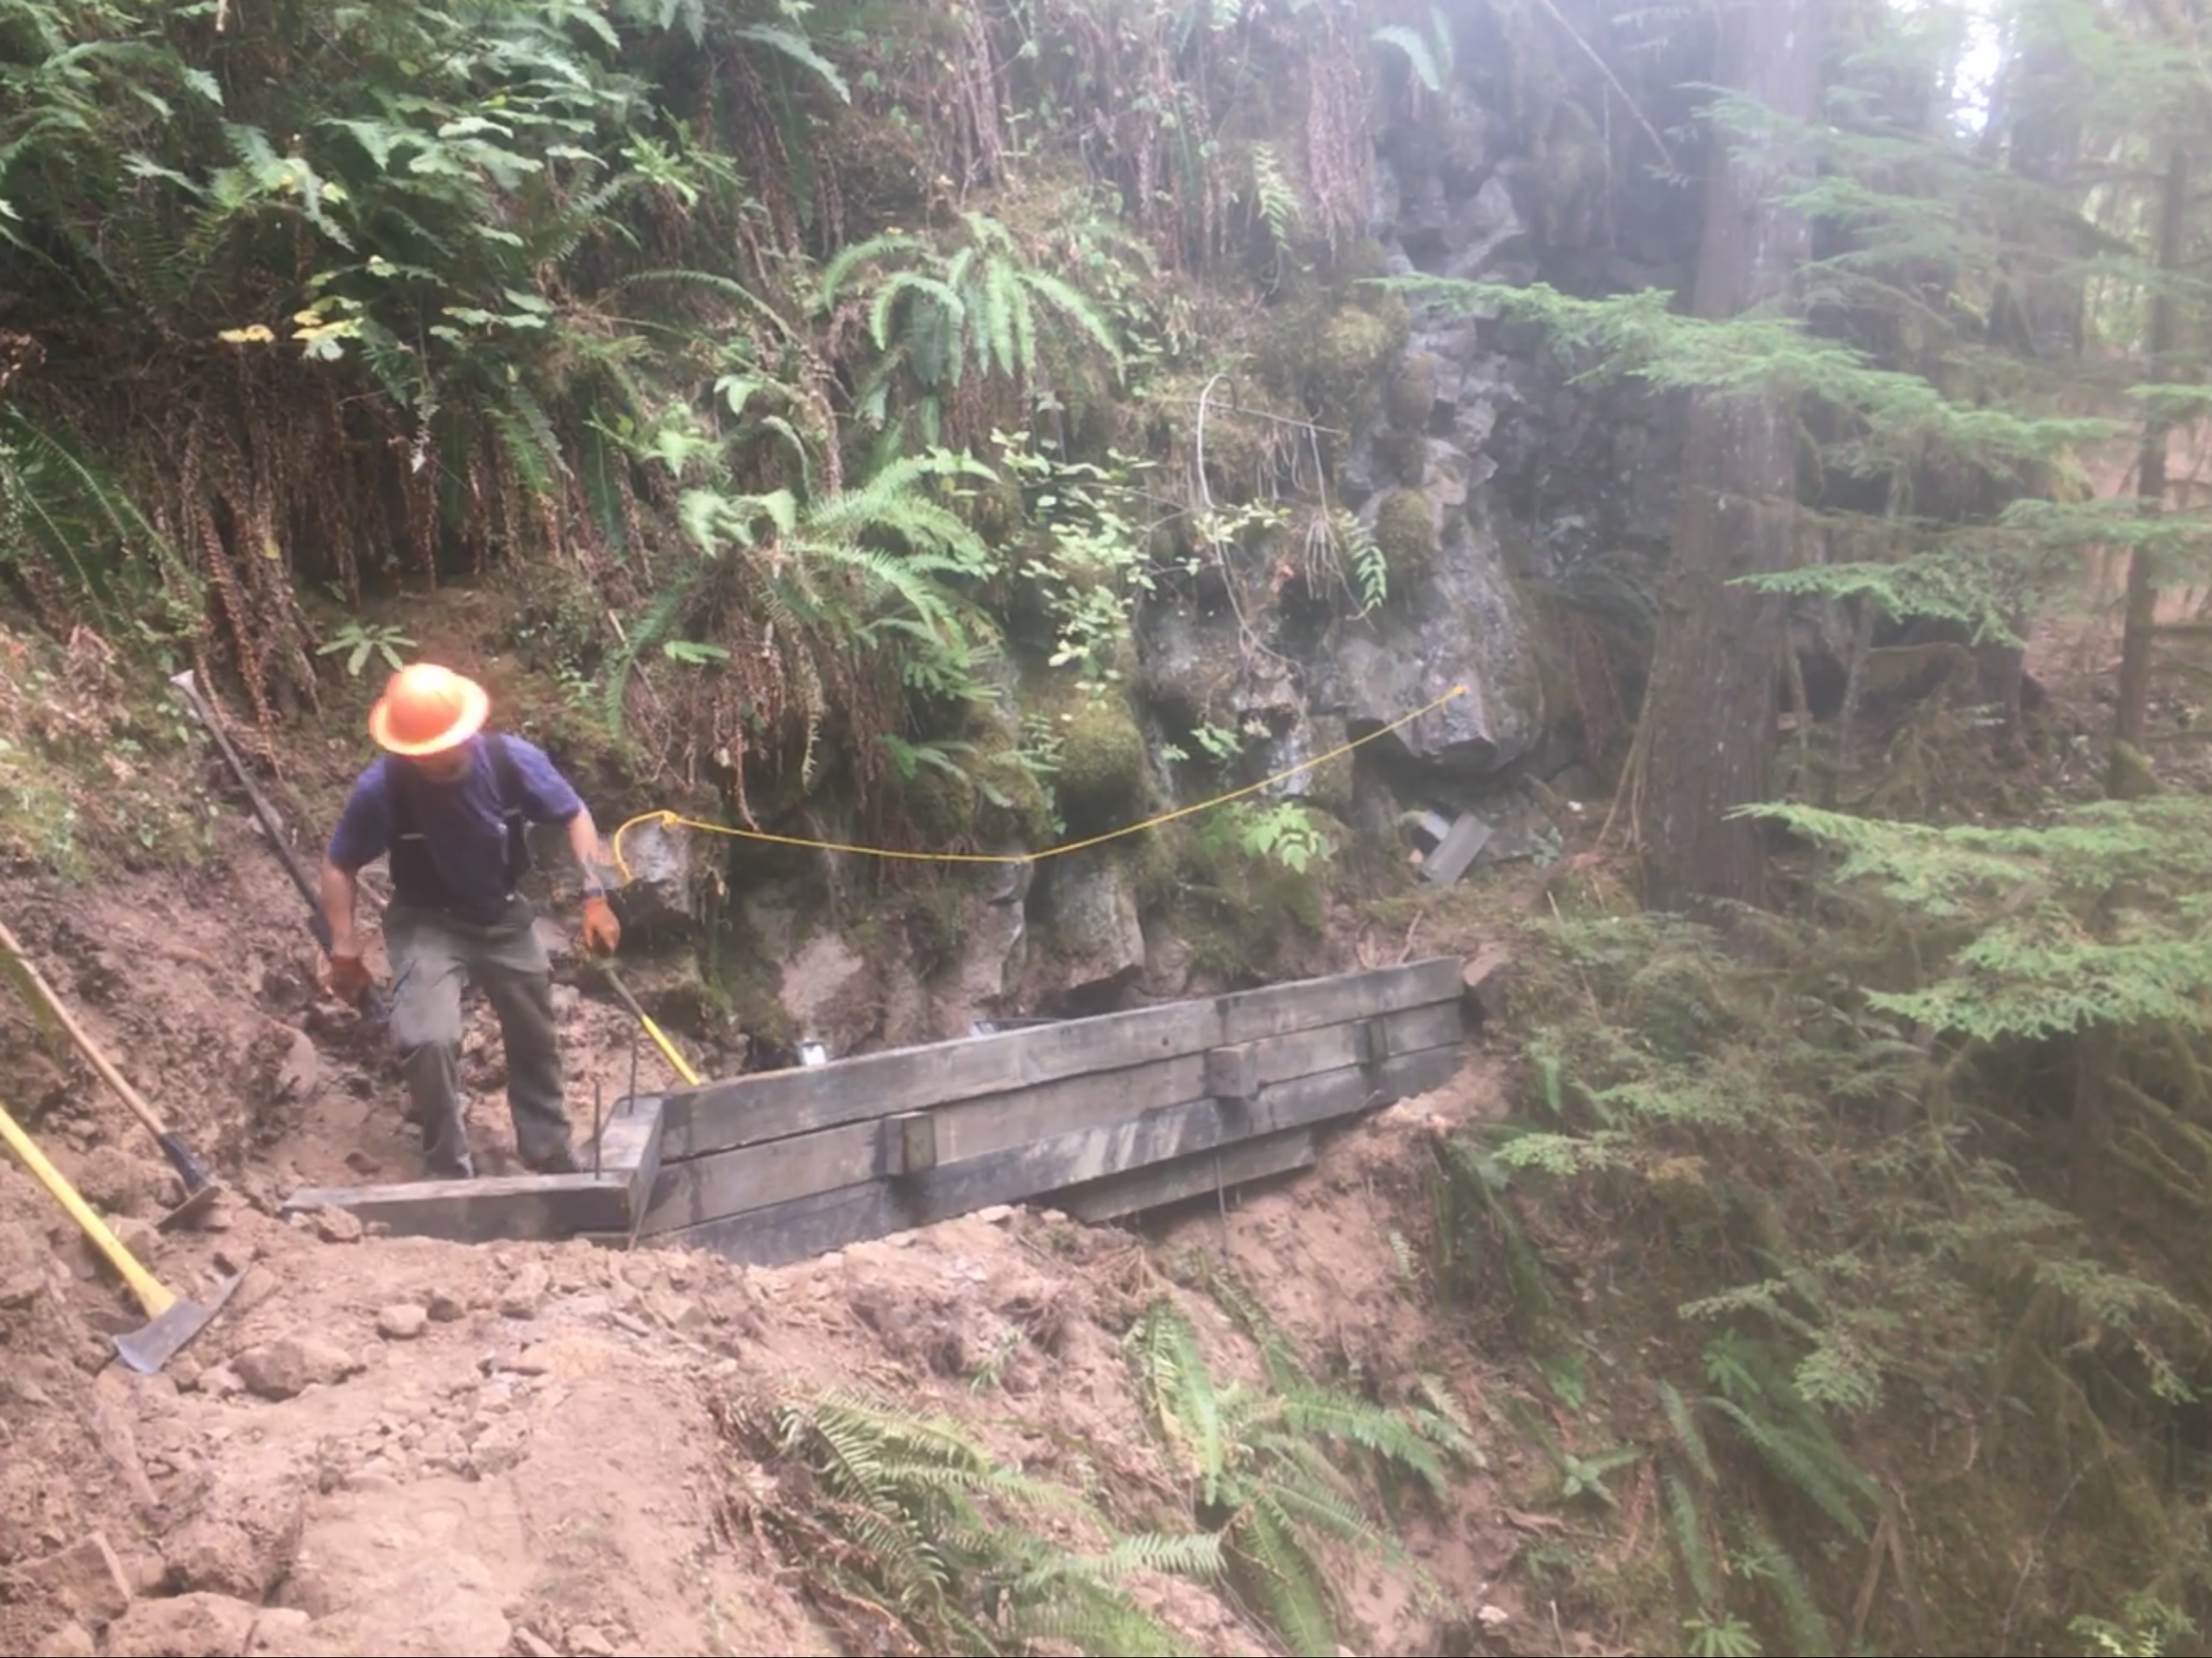
In the below photograph of the first excavation it’s a little deceiving as the dirt on the right is mostly on ferns, the trail bed we achieved in the end here was about 18”. There is 100’ mostly vertical uphill and a 30’ drop to the river below on the right.
You will want to determine the angle the wall needs to be. If it’s only a slight angle it would be better to leave the lower 6×6 pieces uncut to save the factory pressure treatment. Get them as close as possible and save the more exact cut/flush for the top and finished end.

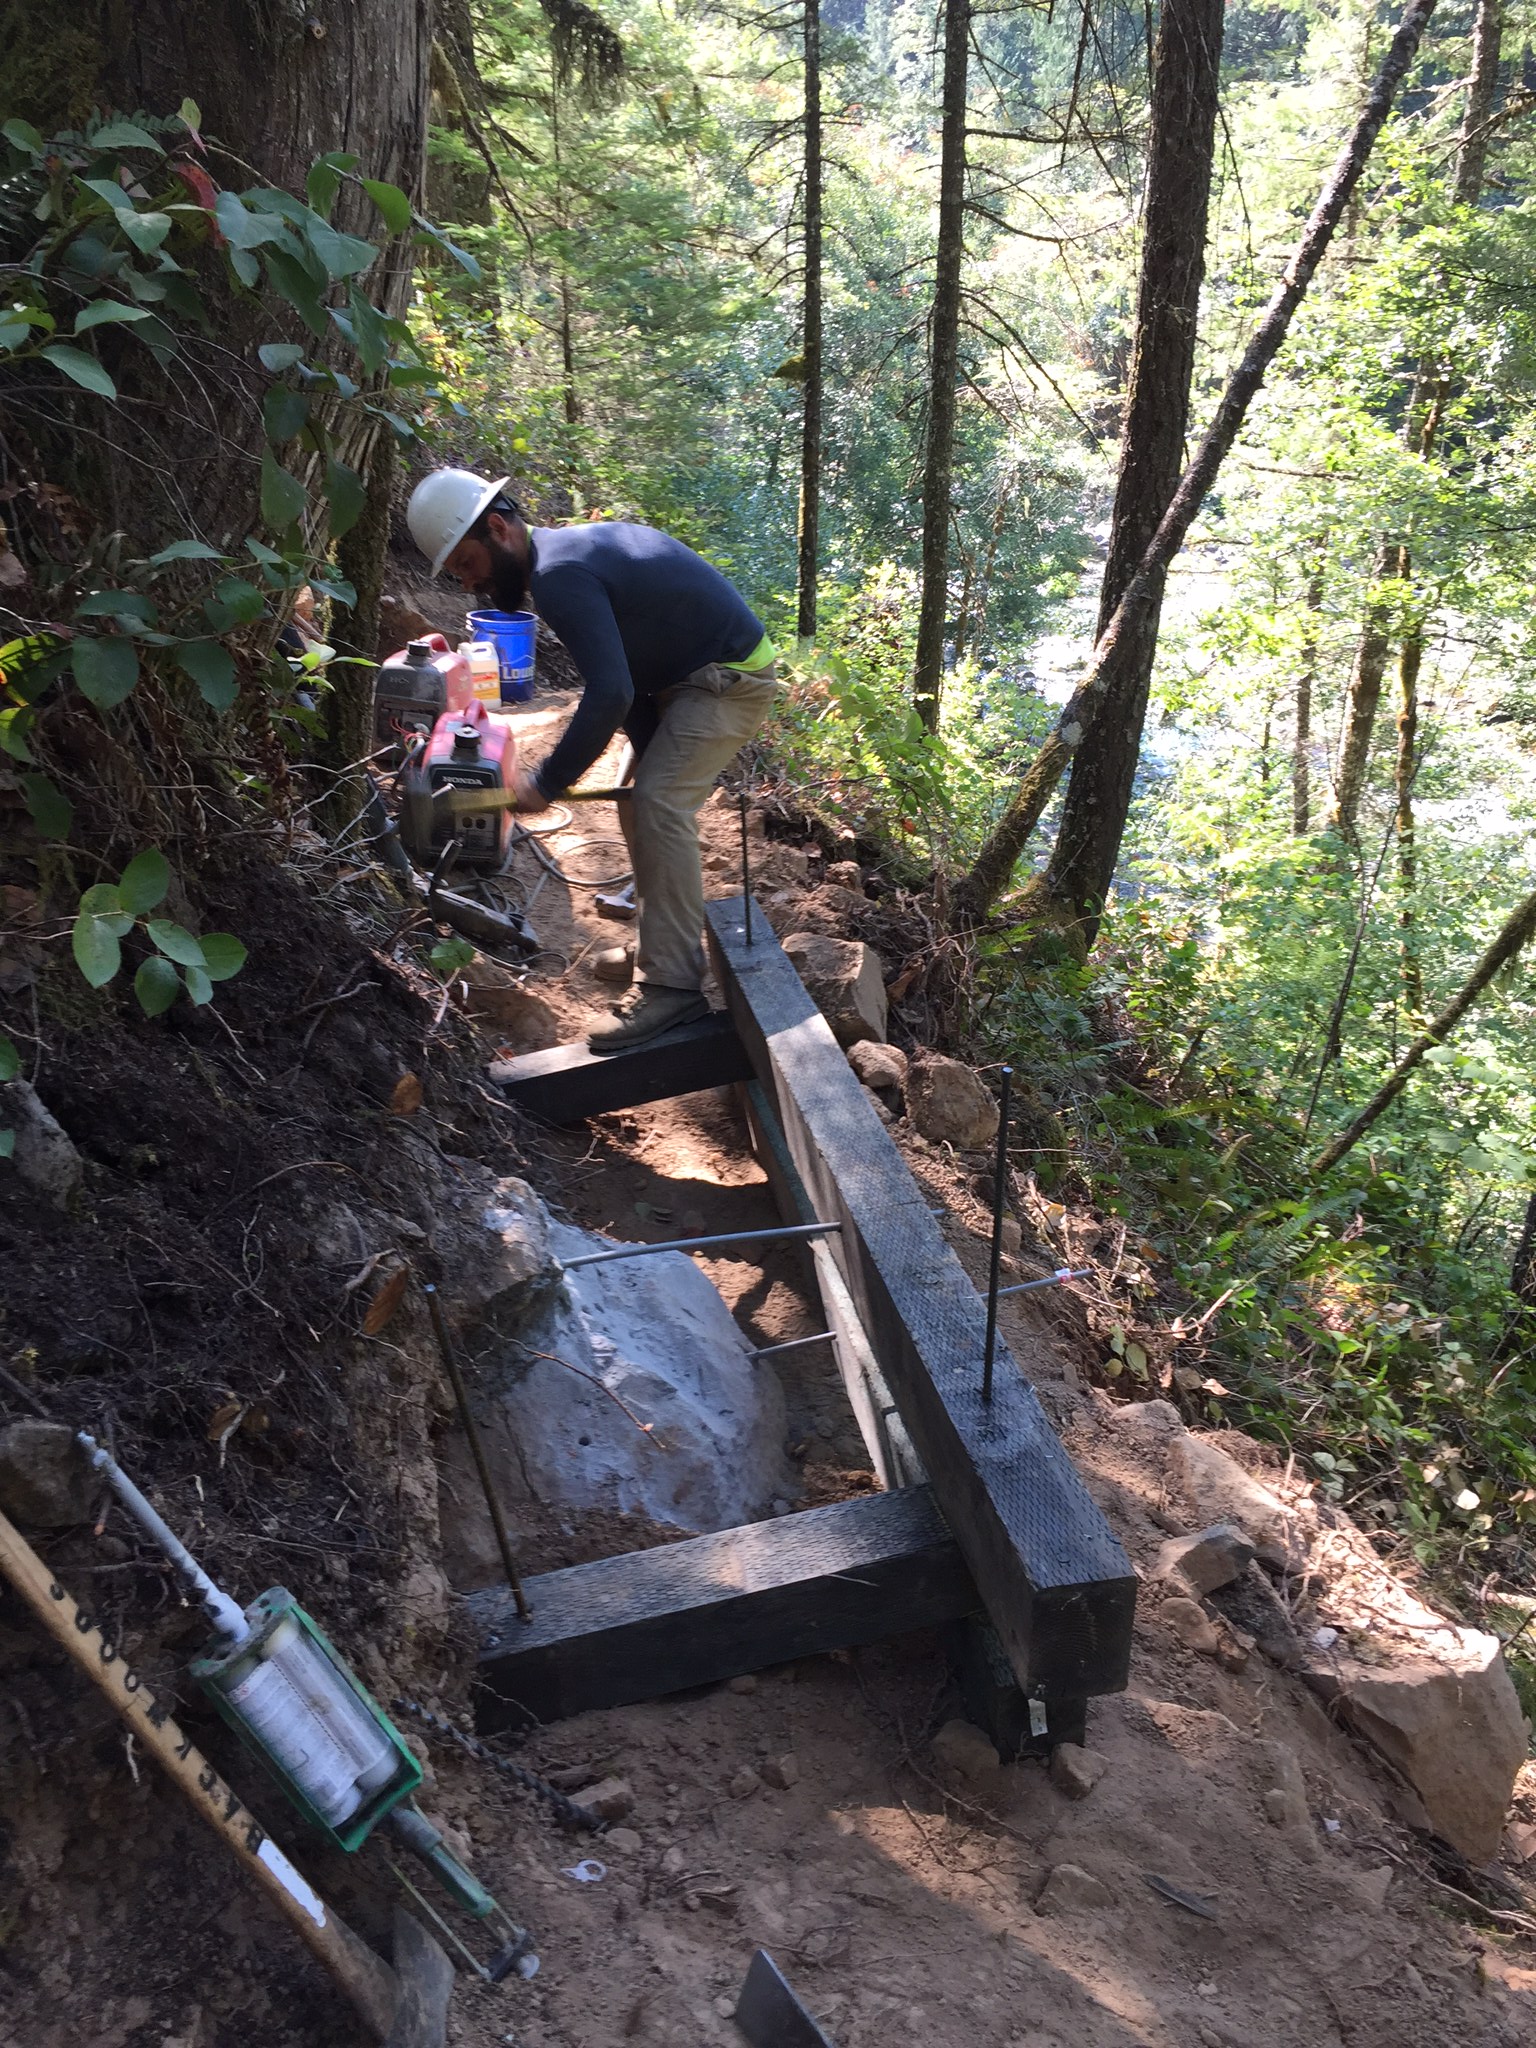
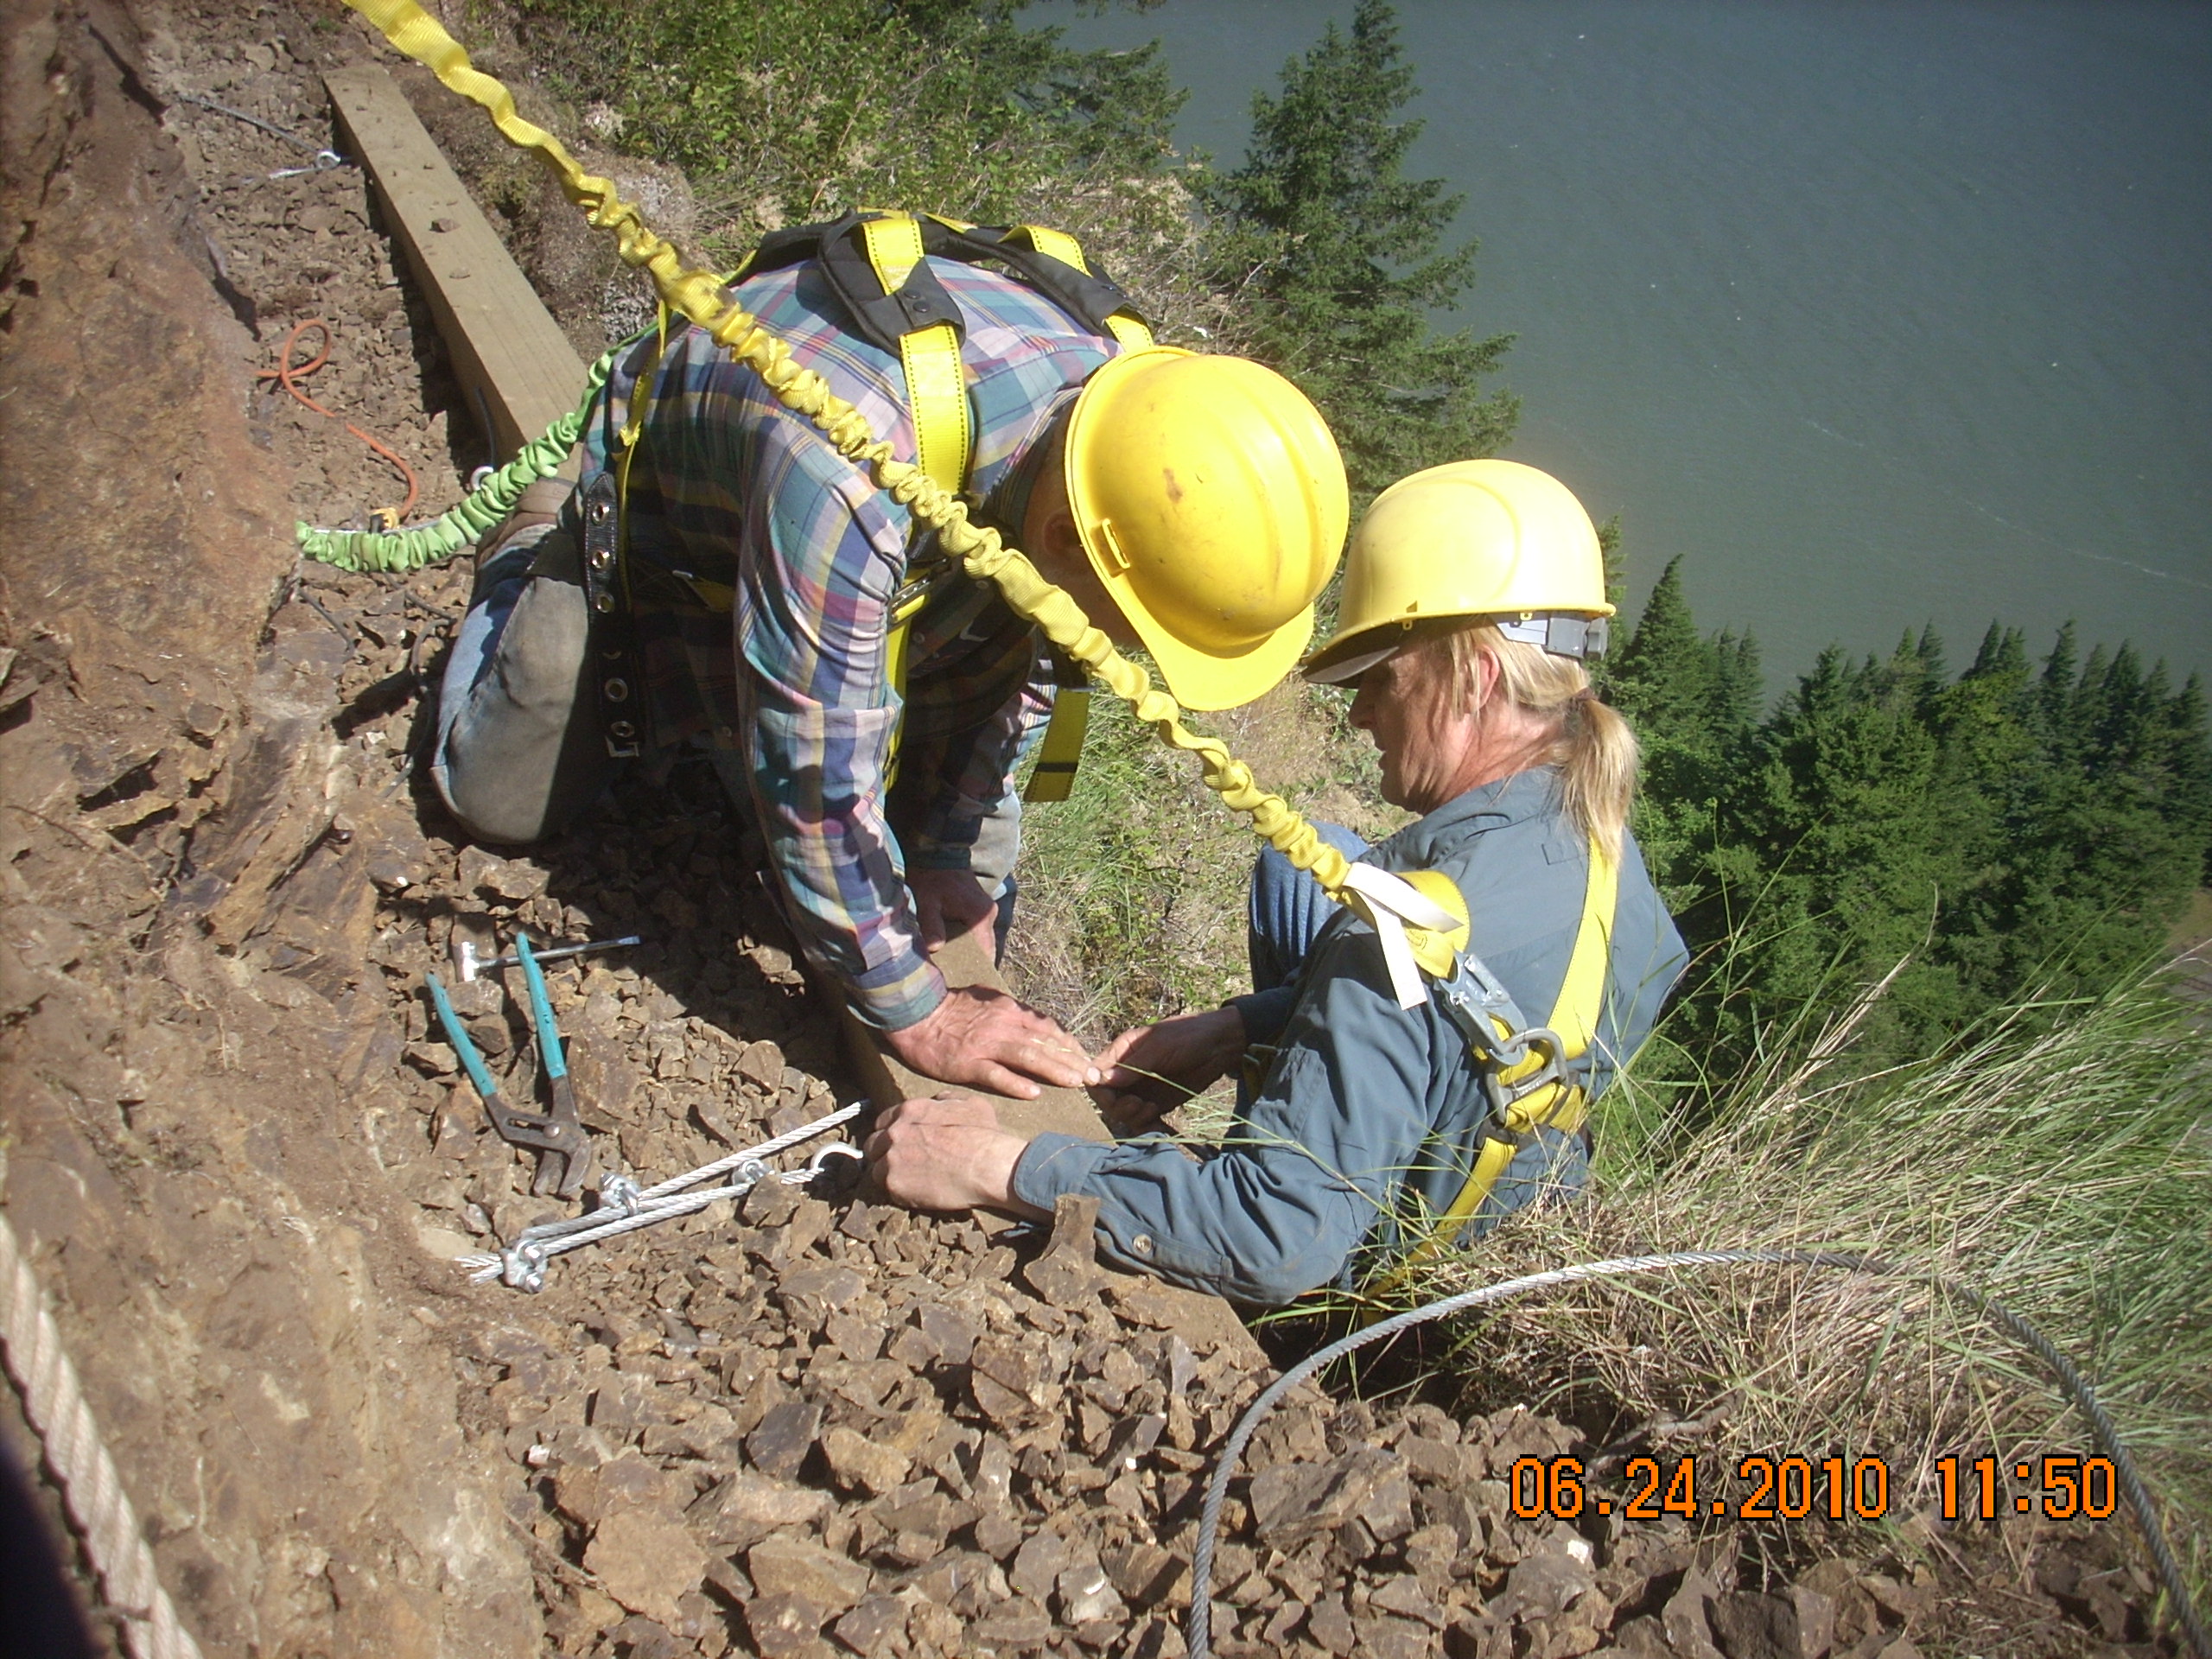
This image shows the rock anchor process on a different wall. What’s difficult to see in this photo is the steeper grade leading into the wall and then beyond me in the photo how the trail rose again. If we removed the main rock that has the wall anchors attached it would have lowered the trail bed too much here. Making it unsafe and inefficient. So a timber wall here was the best solution to maintain a good trail grade.
At this point you want to determine if you will be using rock anchors. Which may be boulders, a cliff or bedrock. You do not want to anchor into a rock that can be moved even with rock bars. You really want to use immovable objects whenever possible. Or several three person rocks, anchored at different points. This depends on the size of the retaining wall and needs to be addressed situationally.
And also you may not be able to put the rock anchors in equal spacing. Having to utilize specific positioning. Which requires flexibility when installing the wall.
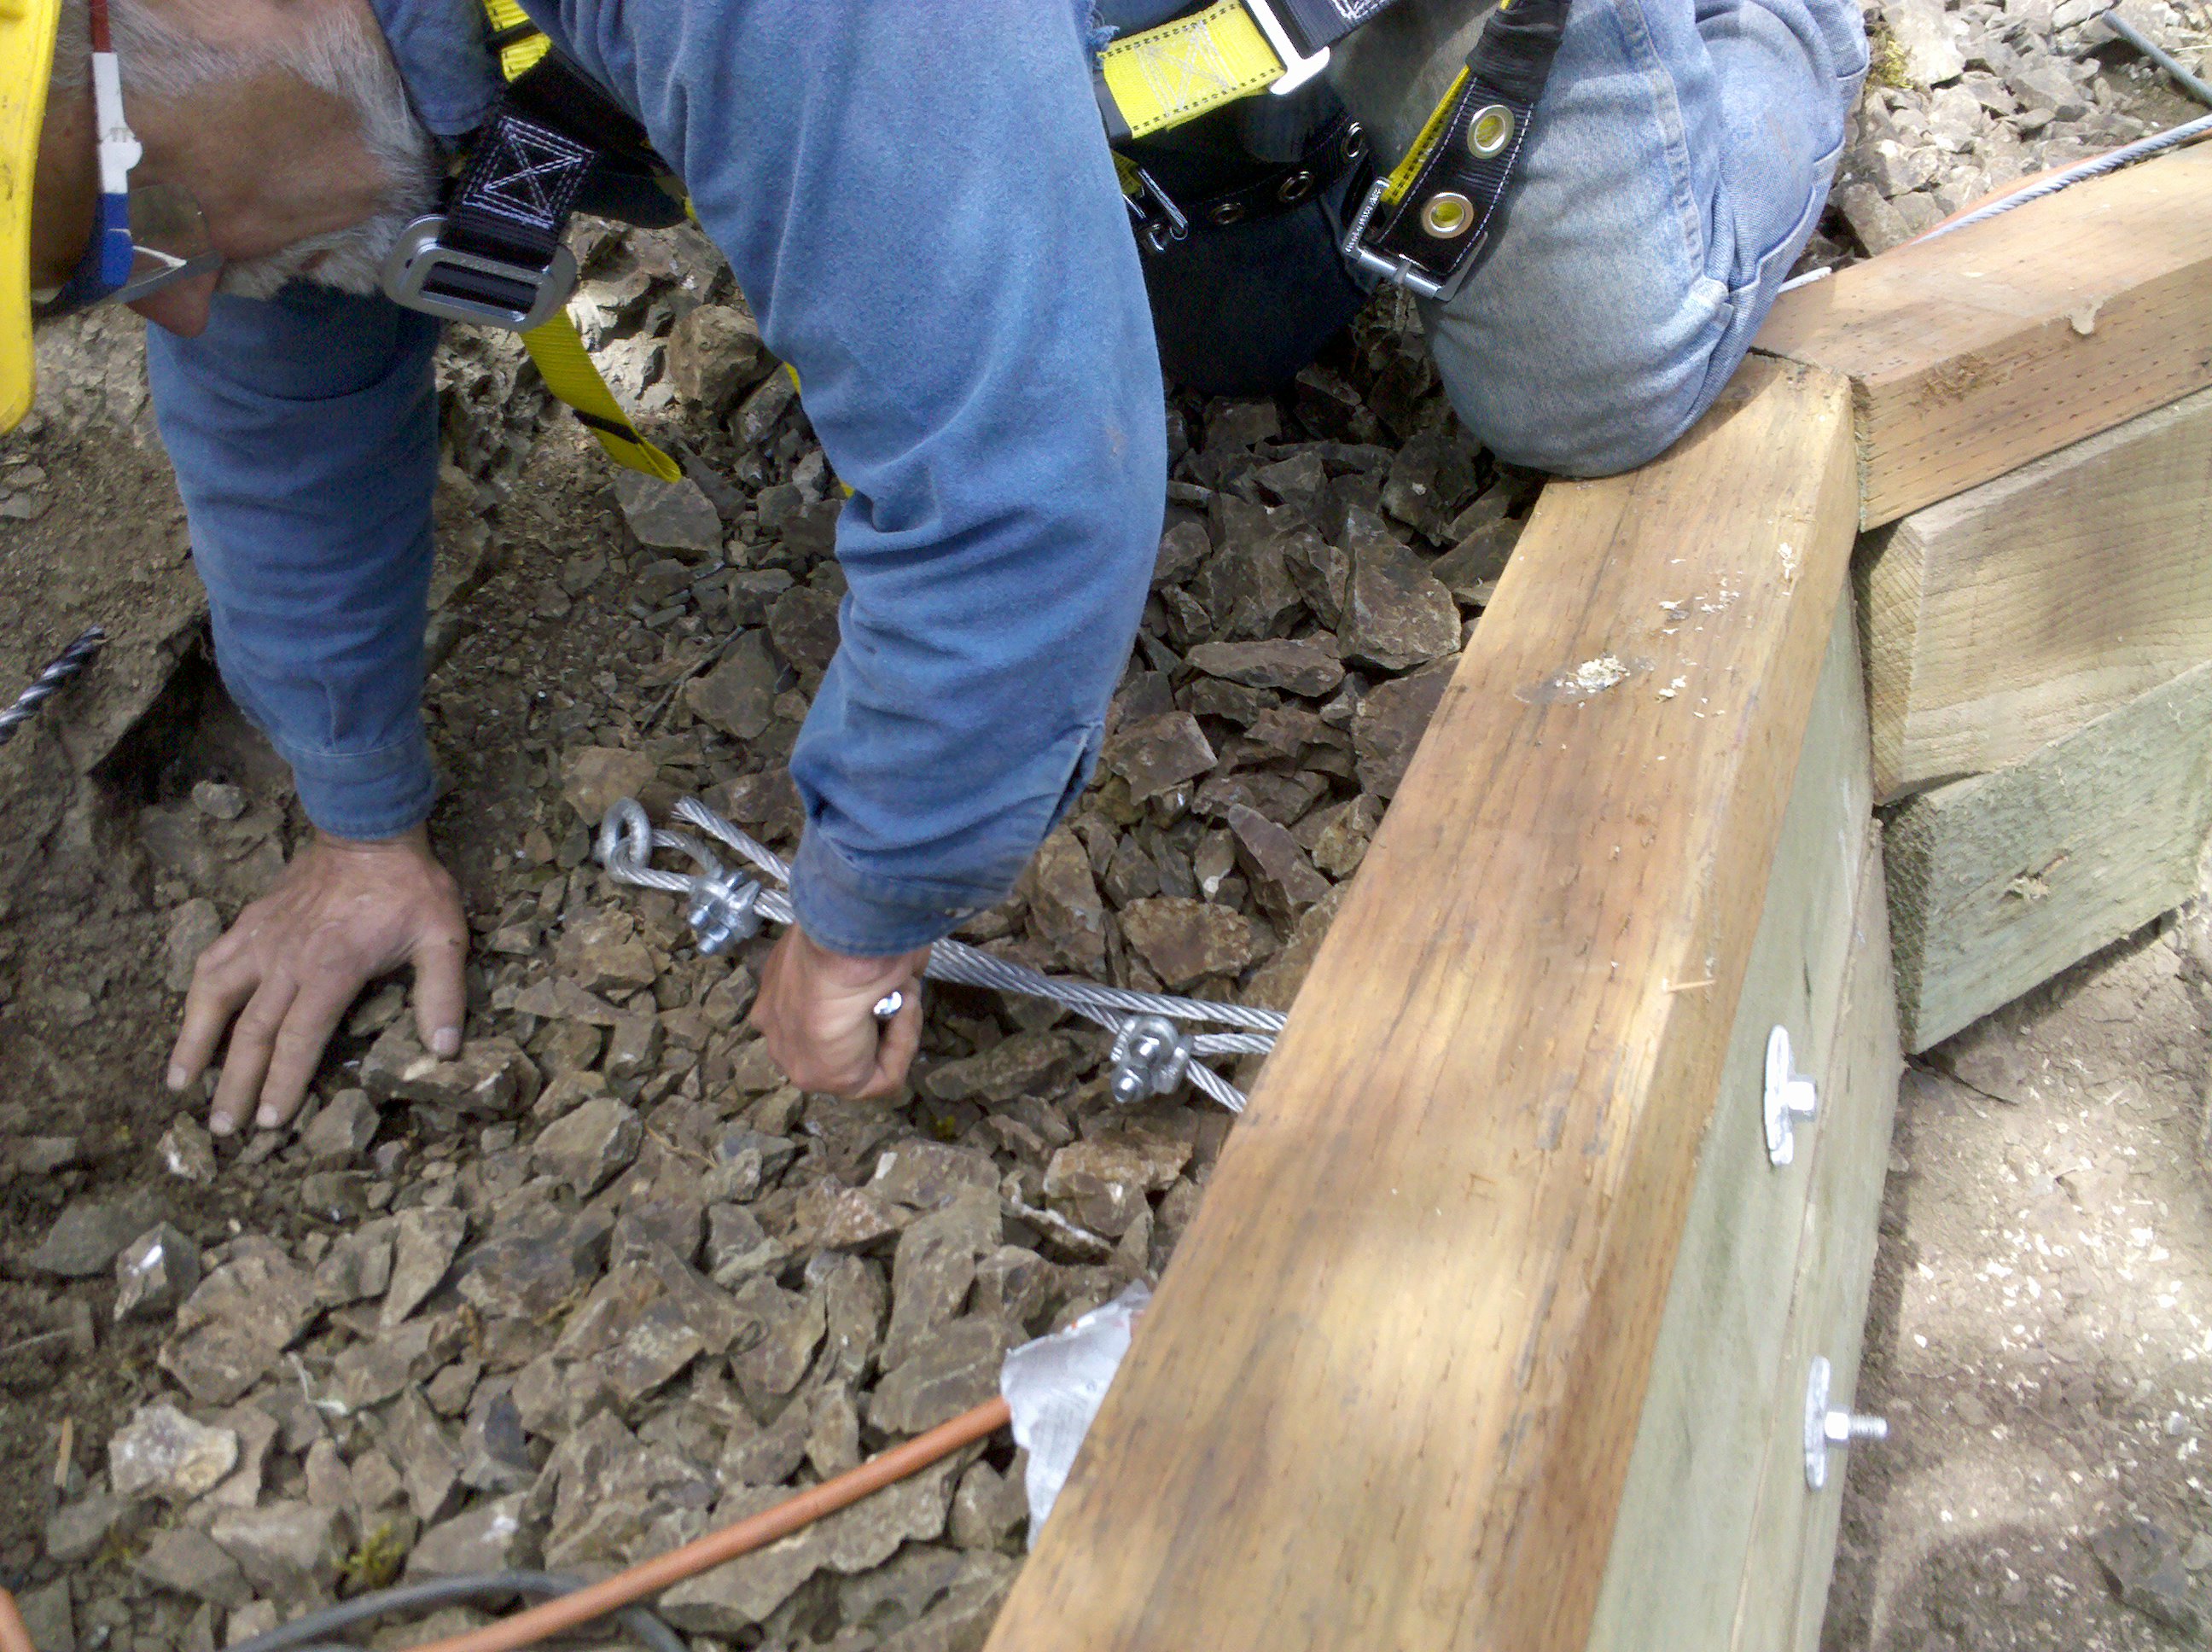
It’s a lot easier to drill the holes into the rock before you install the wood as it gives you a lot more space. Assuming the position of each stringer you want to drill each hole in the rock to accommodate for the angle needed to go through the wood. And then after the wall is installed you eye ball where the holes are and drill through the wood at an approximate angle towards the imbedded holes. You can use a straight edge if you need. But if you get the rock imbed close and the PT wood hole close you should be able to line up both pretty well. With a little bending of the rod onsite as needed with a hammer.
Note: the handy thing with the rock anchors is they’re usually 1/2-5/8 all thread with nut/washer or rebar with a washer welded to the end. The all thread is a lot more adaptable not needing to be pre measured and fabricated offsite. You want the hole in the stringer to be as tight as possible however slight play is ok. You will be using a 2 part epoxy in the rock holes, which have been drilled at least a foot into solid stone.
In the end you will create holds both horizontal and vertical. The exact dimensions of all this will need to be viewed and determined at your particular location. As long as you’re using consistent build techniques the need for adaptability to fit the varied terrain you’ll meet in backcountry like settings is a critical part of being able to install remote access walls.
…………………
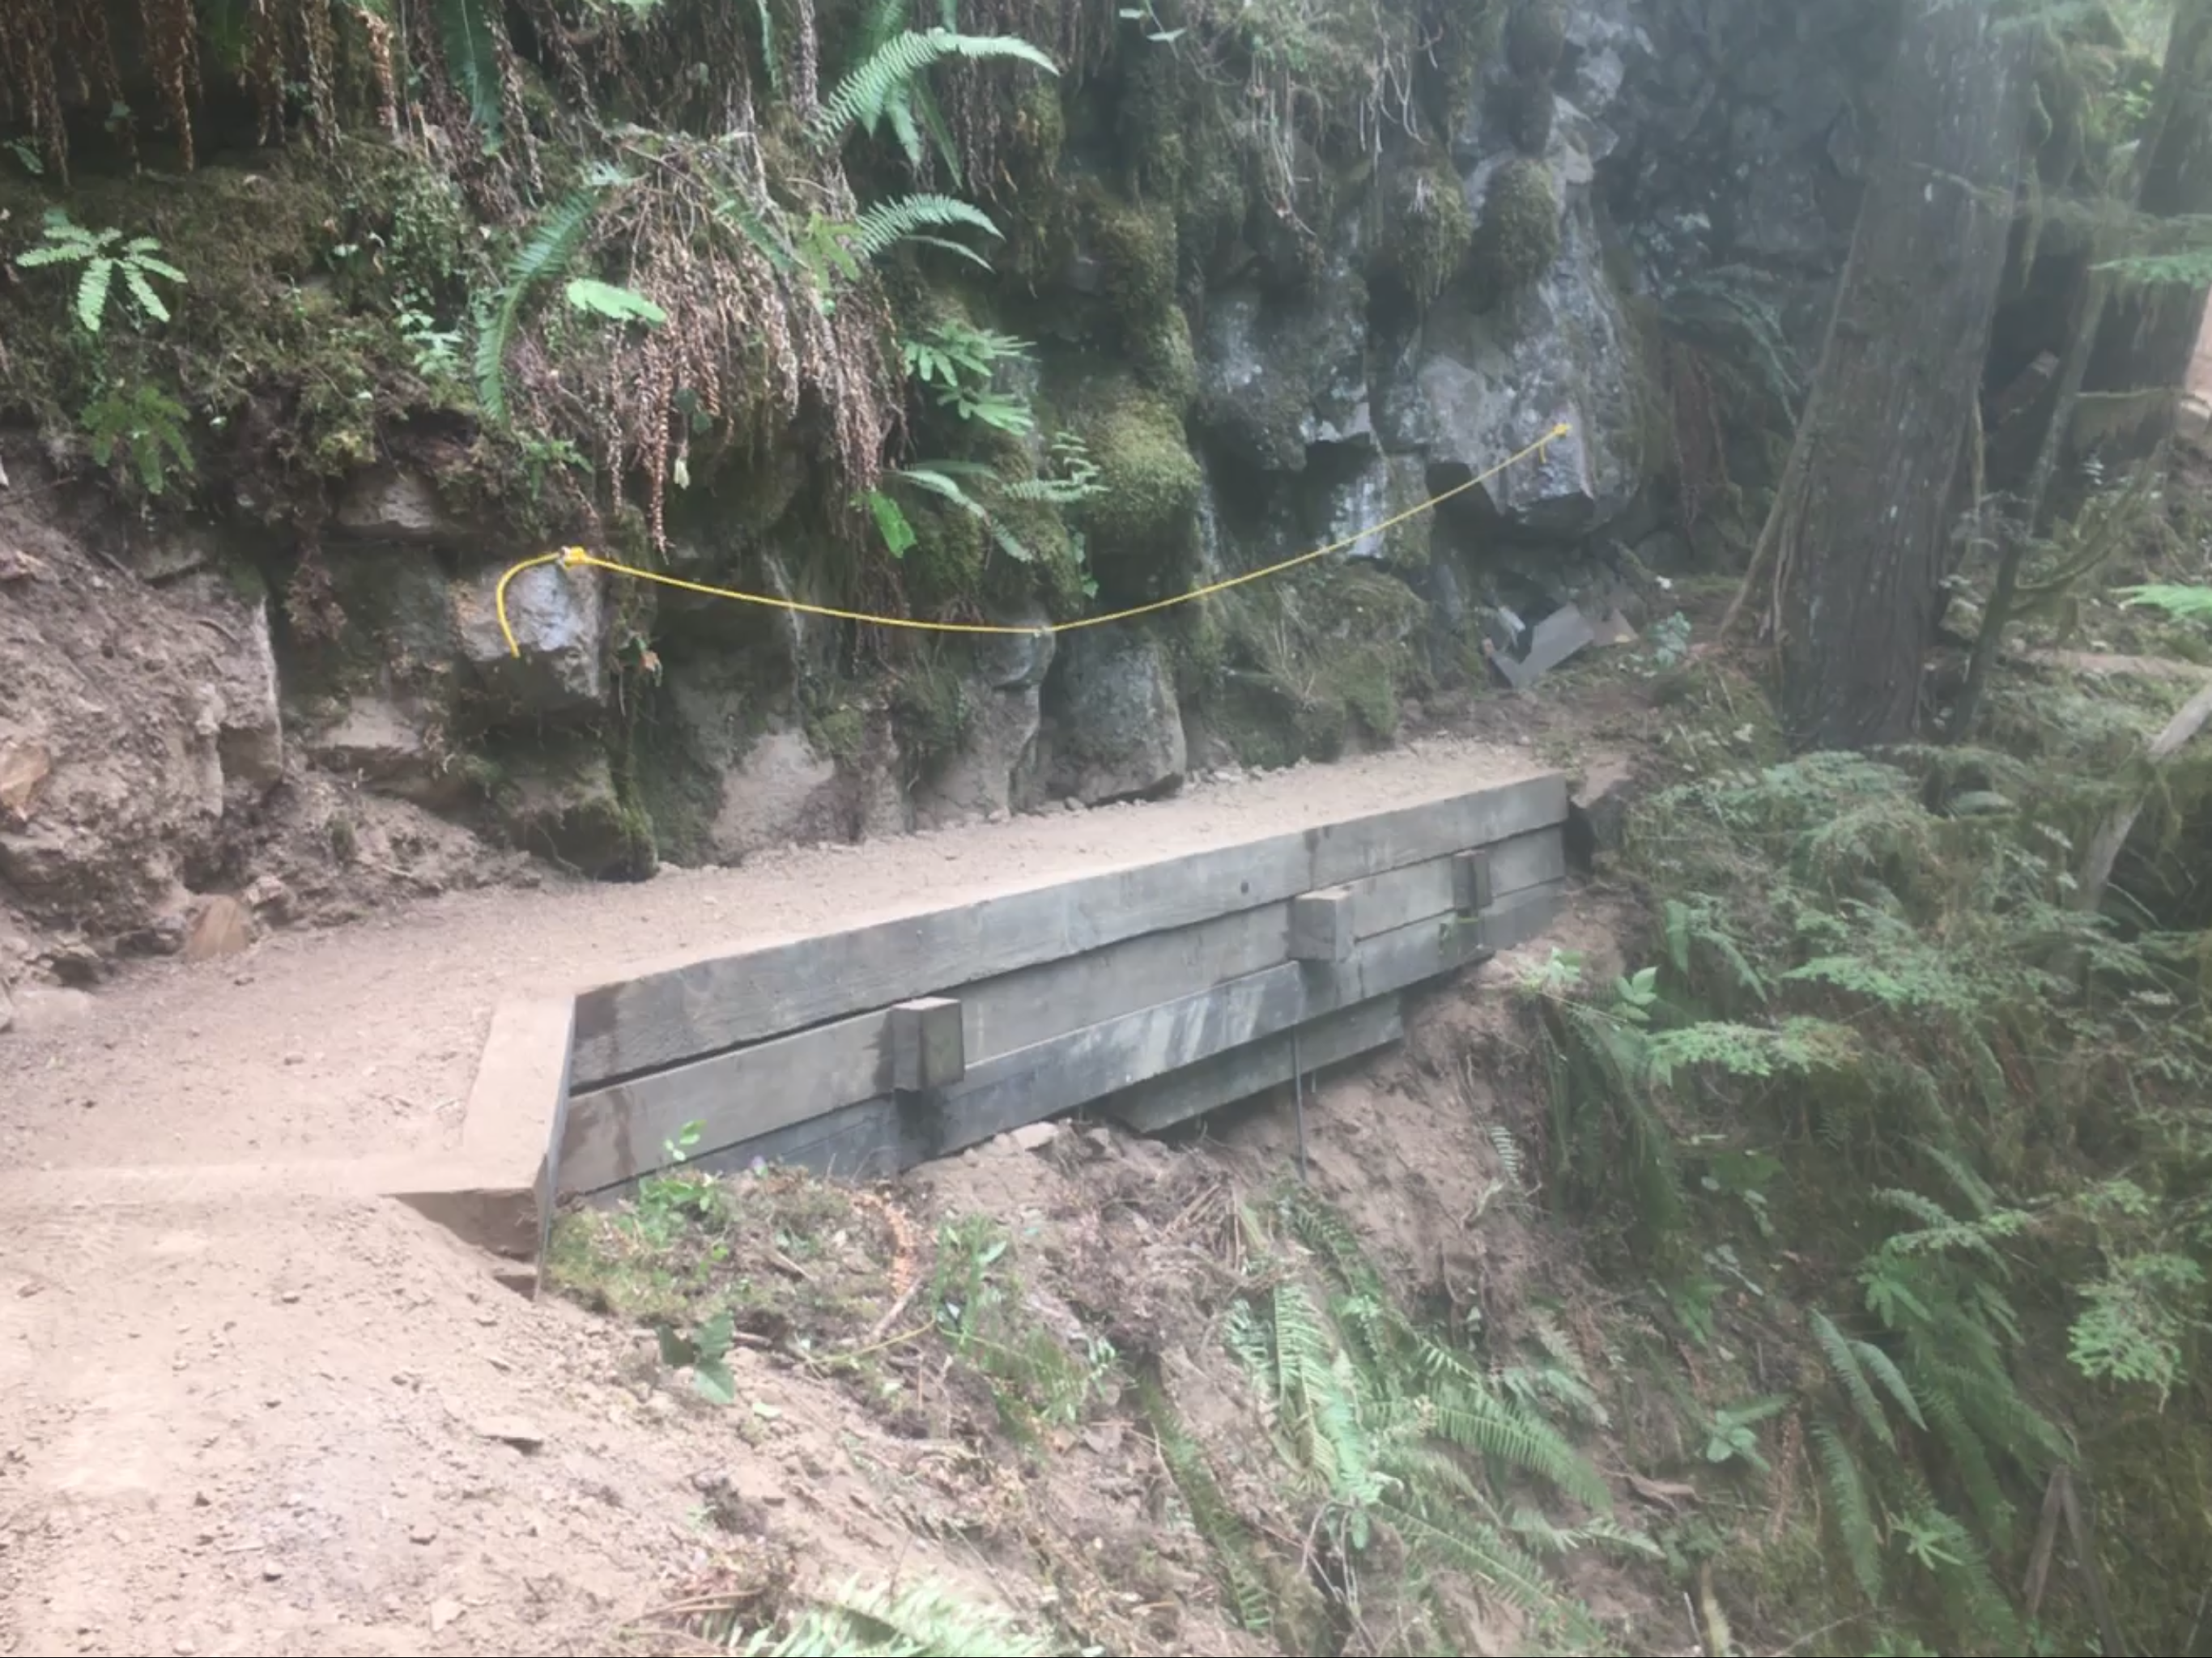
Once the base stringer is in place with a slight batter then you are ready to excavate for the tiebacks/deadmans. It depends on the finish look youre going for, I personally like the deadman’s protruding 1-2 inches from the outside of the wall. It gives both a little extra support visually and physically to the superstructure.
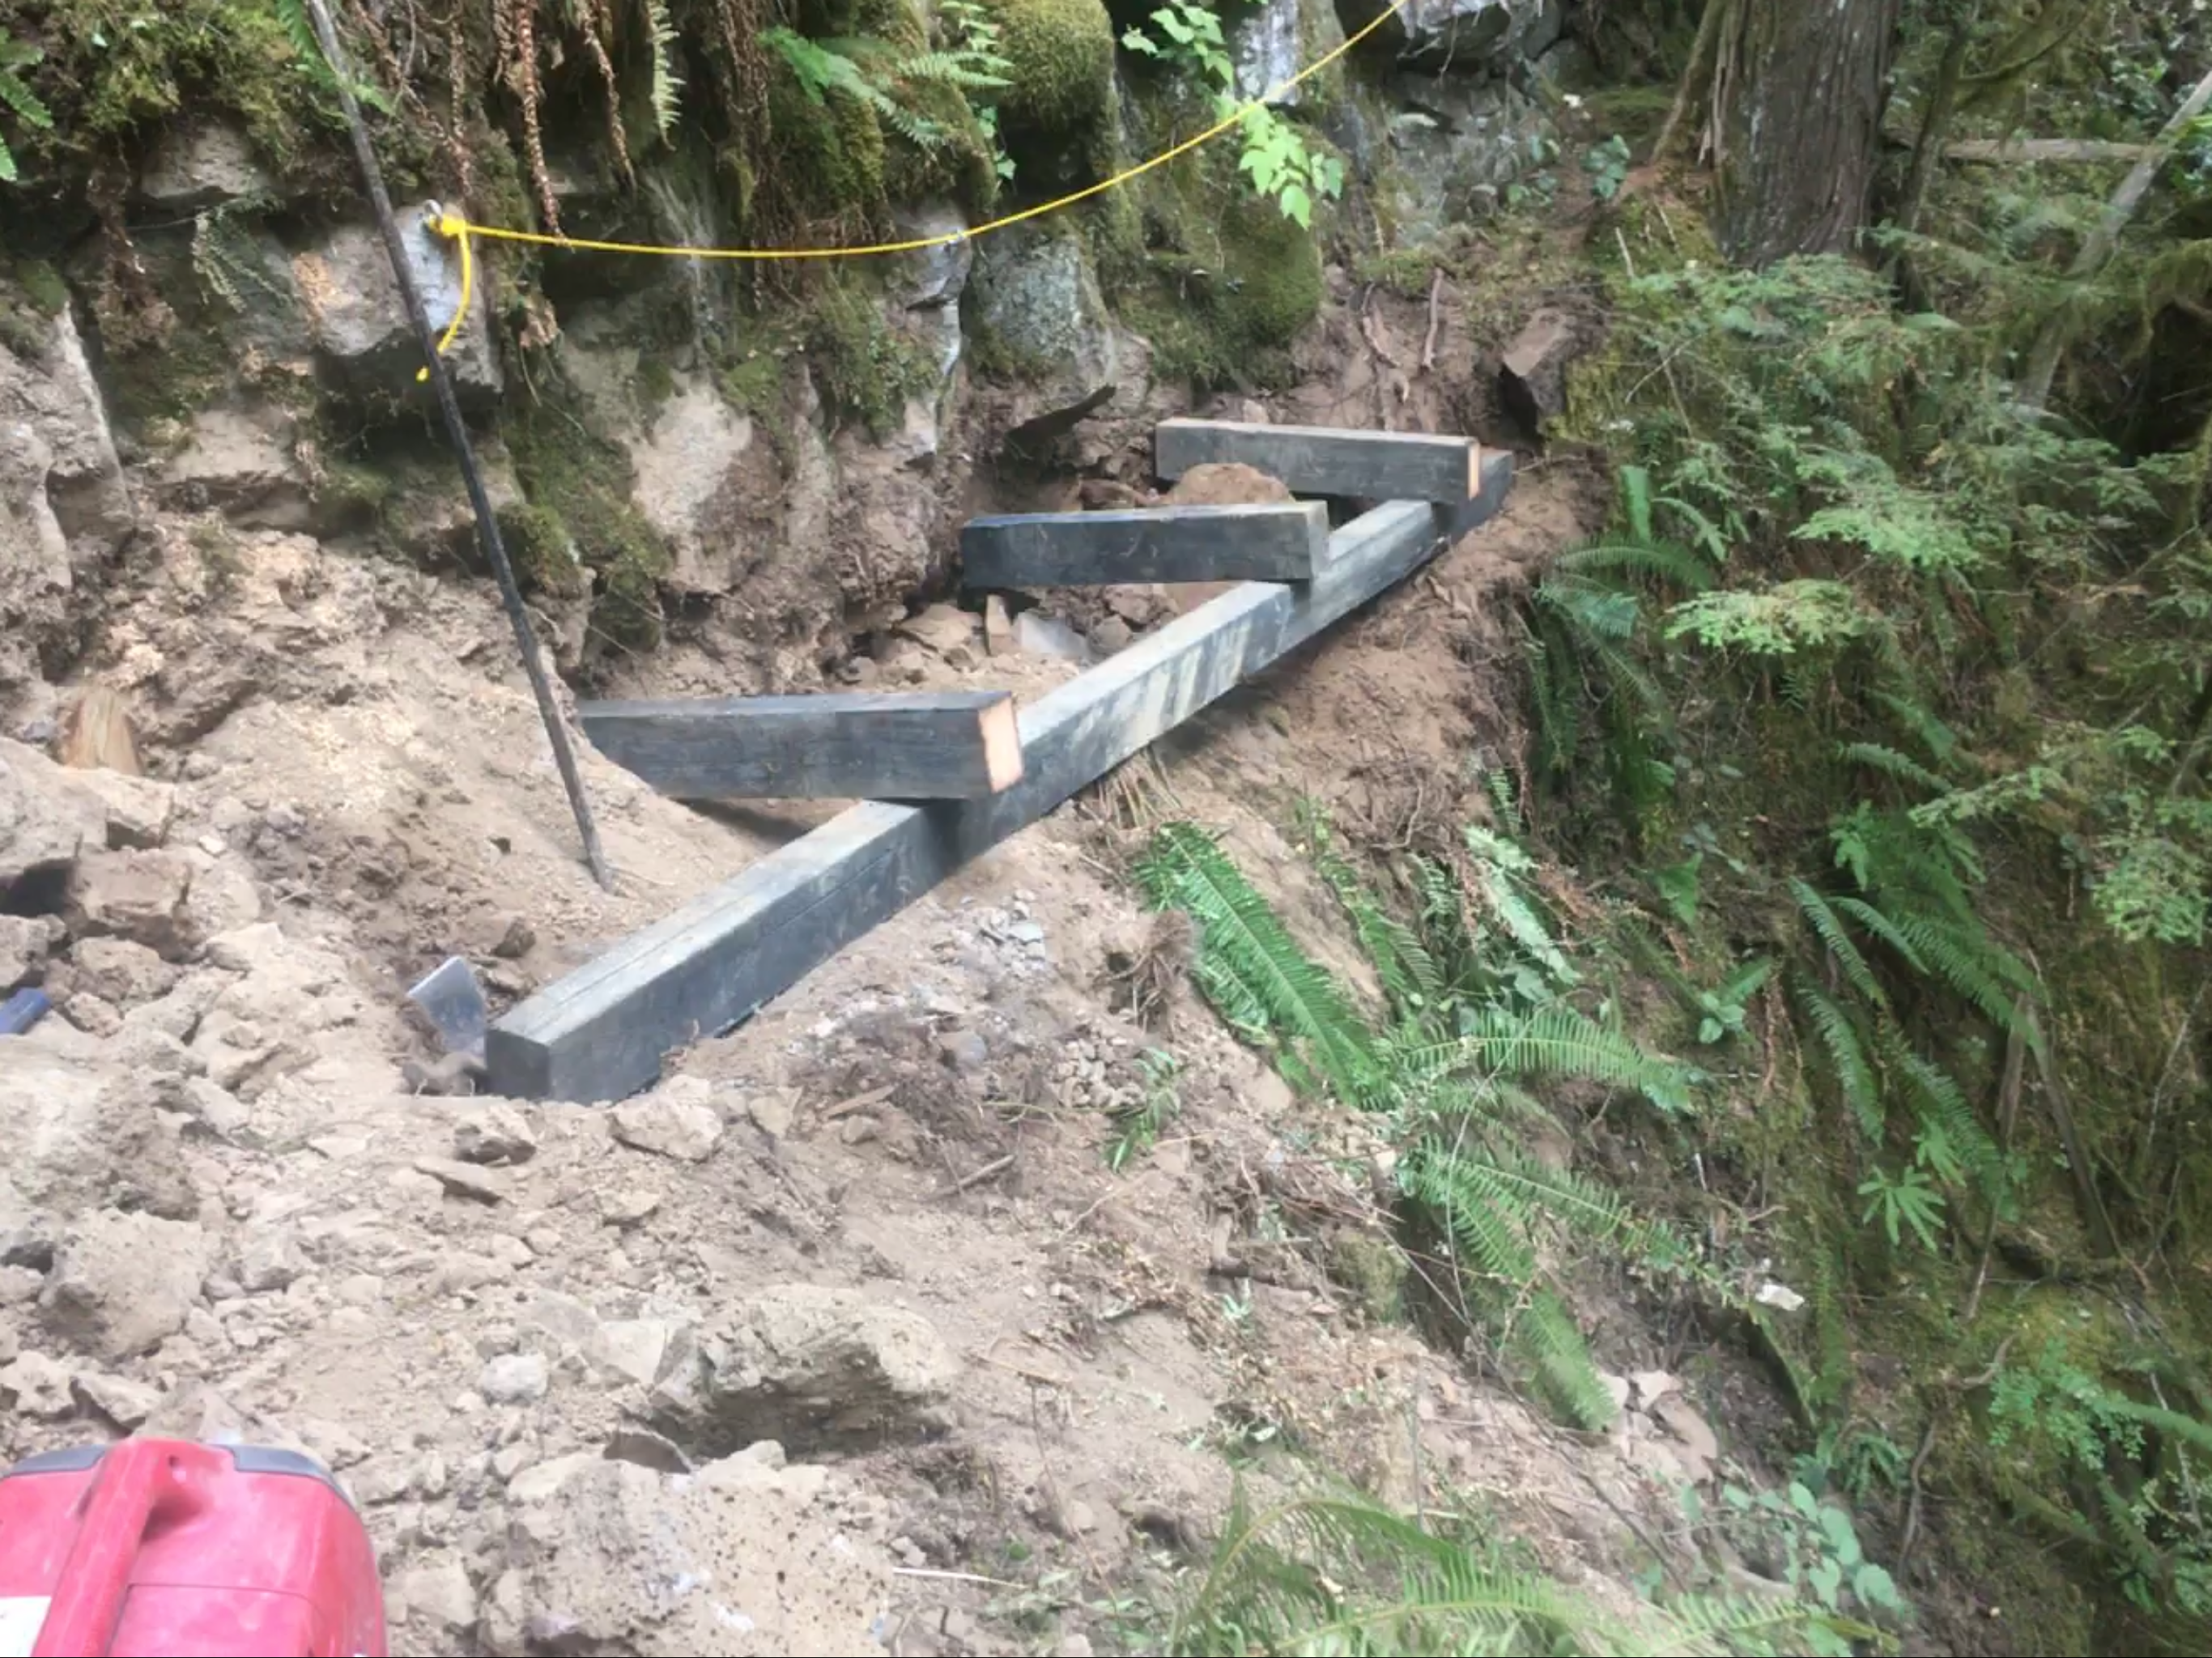
Prior to rebaring the pieces together, In the photo below you see the first and second deadman are positioned about the same pitch away from the edge of the trail. While the third is more flat. This is because it was placed on a rock which in this case we drilled and epoxied. I believe the other two we were able to pound rebar into the ends of the deadmen’s.
You will also see how the 12’ 6×6 has a clear space underneath. Given the steep narrow working corridor, it’s important to fill in the hole with rock and well placed pt lumber. Which we were able to do in this case.
You will notice there is a gap where the first deadman connects to the stringer. If it’s possible you can tilt the stringer inwards a bit more as well as back fill the cliff side of the deadman. While it’s not always possible if the terrain doesn’t allow, you want even contact where the wood surfaces meet.
Which means the deadman excavation needs to be the same level as the pitch of the stringer. Once you have two deadman’s placed, you can temporarily hold with one screw while you drill both the deadman end into the dirt about 6” from the end.
Then pound rebar ideally that fits snug into your drilled holes. Not too tight and not loose.
Assuming all the materials are onsite, once the ground is excavated that will determine if you can use full length stringers, in this case two 12 footers with assorted smaller sizes. As well as what the final length of the deadman’s are. For taller walls, you want to use longer deadman’s.
In the case of a three foot wall, and assuming a three- four foot wide trail, 4 foot deadman’s with 2.5’ rebar pins should be enough. Again this depends on the terrain. Softness of the soils. Whether rocks can be anchored into etc. And what the design elements call for. Ideally if there are outside designers involved they have a good working knowledge of timber retaining walls. And have put in the contract flexibility for unknowns in the terrain.
As you get more experience in technical settings you can be more adaptive when the moment calls for it.
…………………
With the base stringers and deadman’s in place, you might have a 1/2 “ gap between the stringers where you tweak the angle to accommodate for a turn in the trail. Which is ok for this application because it will save the factory pressure treated ends and will be covered over with soil. You will want to cut the top level so any angle changes that are visible are flush and even. Both vertical and horizontal. Spot treat any cut ends with pt paint.
………………………
Once the anchors, deadman and stringers have been fastened down then custom cut the 2×8 pieces and screw them into the back part of the wall inside the gaps created. Or in this case 6×6 rebar pinned.
Depending on how the wall sits along the trail you will need to place rocks at each end to contain the soil/gravel/smaller rocks. Ideally though you will be able to install the wall directly where it’s needed such that it cuts back into the trail on each end, limiting the amount of large rocks or fill there.
………………
Avery Hoyt of Twin Oaks, est 1978
